Content: 1) Access a Module in the Menu Tree Structure 2) Changing the Order of the Menu Items 3) Single Pages |
This manual helps you to work with the Menu Tree of the SSWM Intranet. On the Menu Tree, you can edit the website structure and set up new modules (e.g. STEPs). The manual explains how to create/edit elements of the Menu Tree and how to add content (factsheets, pages).
Direct link to the menu tree: Edit the Menu Tree.
1) Access a Module in the Menu Tree Structure
Go to the following page: Edit the Menu Tree and select “list terms” of the menu you wish to see. The term “Term” can be understood as “Menu Item”.
NB: Never choose "edit vocabulary"
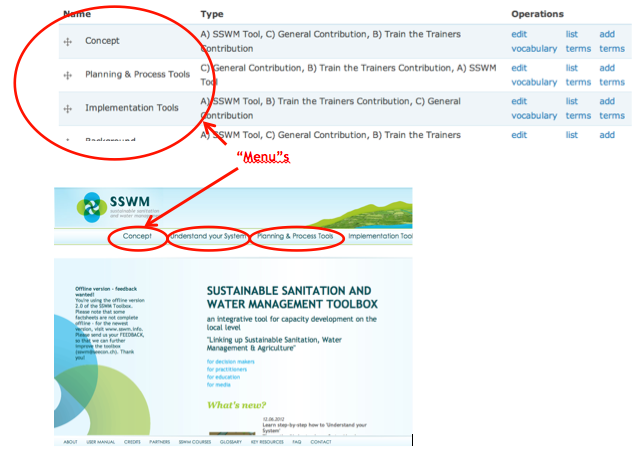

NB: Don’t use the up/down arrows to change the order of the menu items! Especially in a large menu you could end up with a complete mess! Use the following method to rearrange the menu items.
2) Changing the Order of the Menu Items
Click on “edit” (see above) for the menu point you wish to move up or down in the menu.
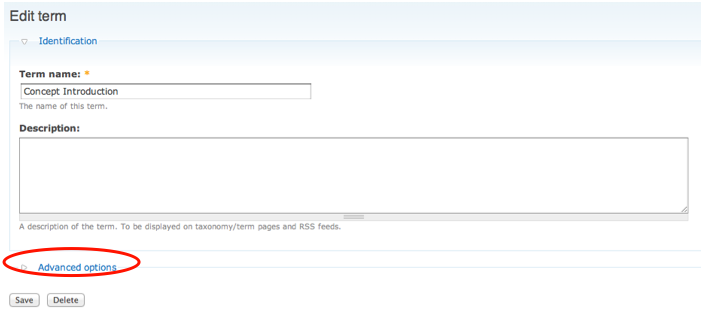
Near the bottom of the page you see “advanced options”. Click on this link. You will see the following screen:

At the bottom you see the field “weights”, the higher the number, the lower the menu item in the tree. A menu item with the weight 0 will stay on top, a menu item with the weight 10 will be lower. So if you want to place an item in a specified place, you have to look up which number the item before or after this has and change the weight numbers accordingly.
3) Single Pages
Single Pages are Menus were the different chapters are accessible through simple links in the left sidebar, e.g. "Concept".
You already know now the following screenshot. It shows the menu structure of the menu “Concept".

In order to make a “content” for each of this menu items we have to link the respective type of content with the corresponding nid to the item.
Let’s assume you have already created the menu point “The Water Cycle” and you have a content (factsheet template C, nid 1913) with the same title.
You can find the content in the list “contents (factsheets)”.
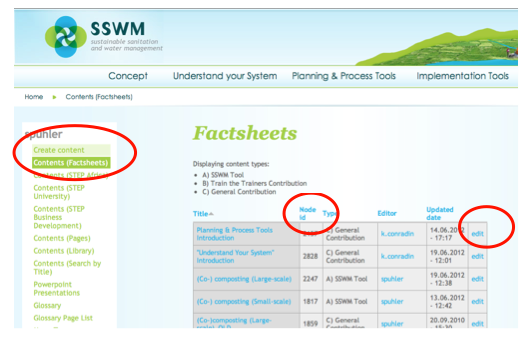
Click on edit for the factsheet with nid 1913.
There you see “Vocabularies”. Don’t get confused with the expression “vocabularies”. A “vocabulary” is the same as the Menu Tree, just in another view.
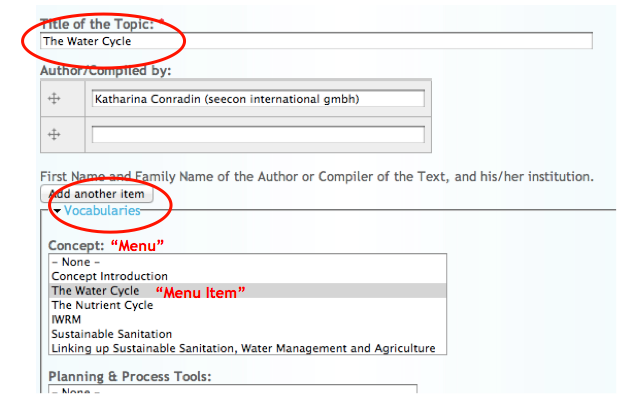
I order to link this factsheet to the menu tree, you have to select the menu item in the vocabularies. Choose the right menu Item in the right Menu.
If you want to make multiple choices (i.e. link the factsheet to different menu items, you can simple do that by keeping the control pressed while selecting.
Click “save”.
The content (factsheet) “The Water Cycle” will now appear when you click on the menu item (e.g. http://www.sswm.info/category/concept/water-cycle in our case).

4) Single Column Pages
Single Column Pages are pages used to show one single column of icons liking to the menu items (factsheets); like for instance the “Planning and Process” menu.
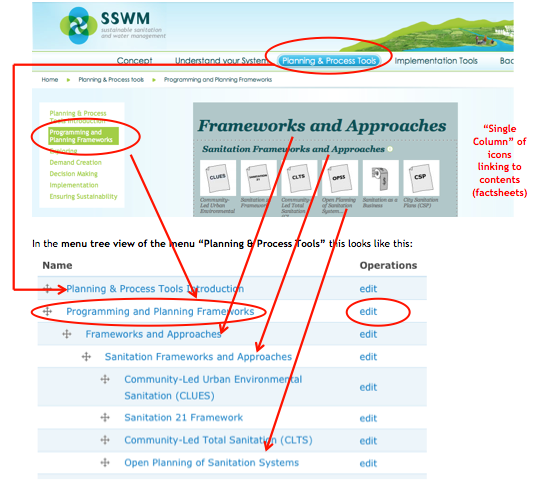
In order to make sure, that our SSWM Toolbox “knows” that she has to display this page (“Planning and Planning Frameworks”) we have to tell her.
Go to the menu item “Programming and Planning Frameworks” and click on edit.
In the field called “Description” write the code word for ”single column” views: “article page” (without any whitespaces before or after it) and save.

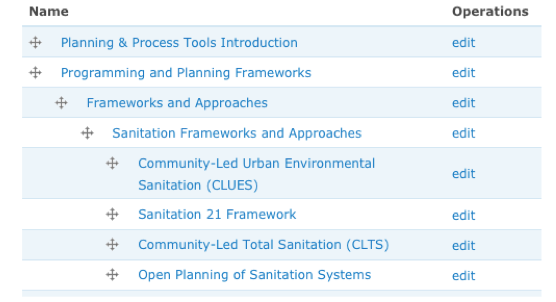
Now the Toolbox knows that there should be built a “single column” page. But it is only able to do this if the structure of the menu is in a certain way. Here you see the picture of the menu again:
In order to create menu items with a hierarchy (e.g. as in the structure above) read the next section.
5) Combined Pages
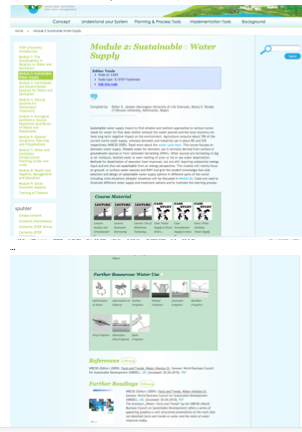
You have also the possibility, to combine a “simple page” and ”single column” page as it is done for instance in the menu of Mudle 1 of the “STEP University”.
On this page, you have a “content” (including the references) and in the middle, you have a “single column” box with icons linking to other contents (factsheets).
In order to “tell” the SSWM Toolbox, that it has to display the page of this “menu item” in a “combined” view.
Go to the menu item “STEP University”.

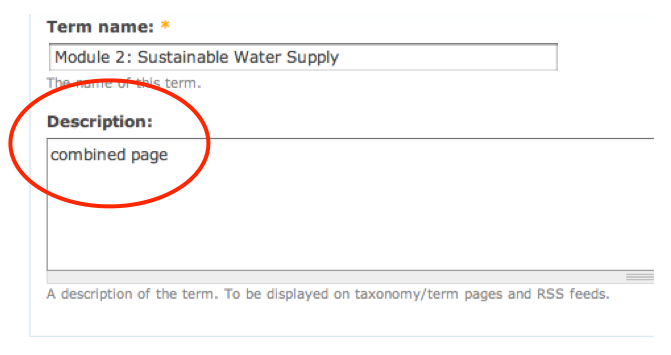
We would like to have a “combined page” for the “menu item” “Module 2: Sustainable Water Supply”.
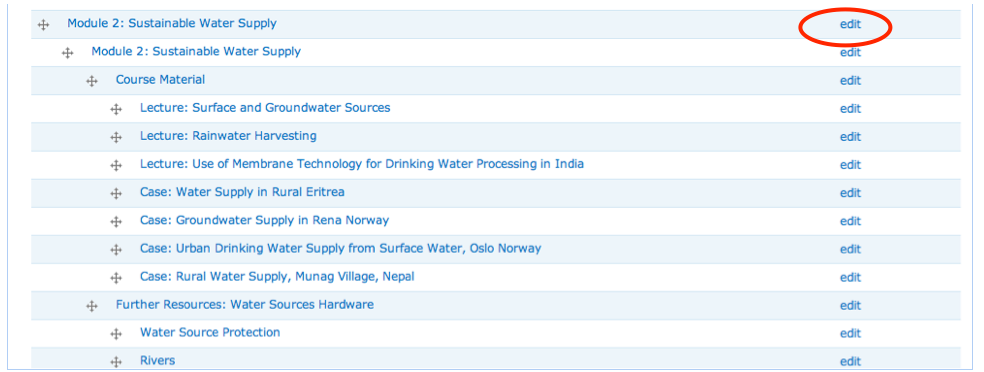
In the field called “Description” write the code word for ”combined page” views: “combined page” (without any whitespaces before or after it) and save.
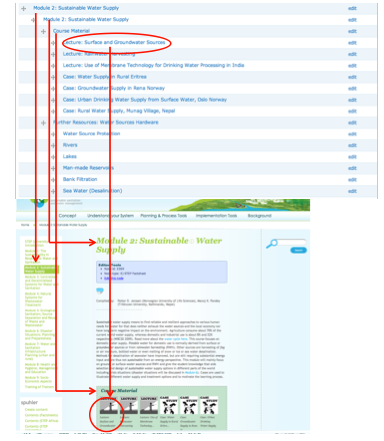
Now you can continue adding menu items to “Module 2”.
The next sub-item after the first “Module 2: Sustainable Water Supply” serves as the page title right on top of the page. Generally you would like to have the same title here although different titles are possible.
“Course Material”, “Further Resources: Water Sources Hardware” etc. are the section titles in the icon boxes, the sub-items of these points (e.g. “Lecture: Surface and Groundwater Sources”) are the icons showing up inside of the box under the according section title.
6) Two Column Pages
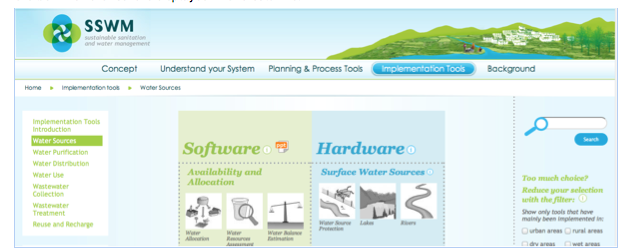
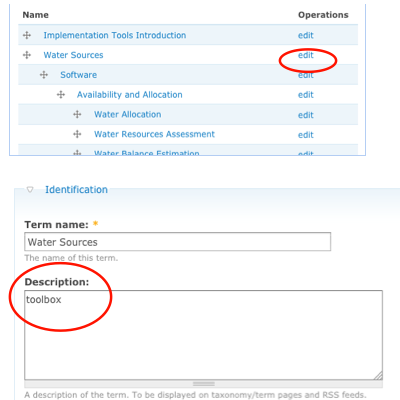
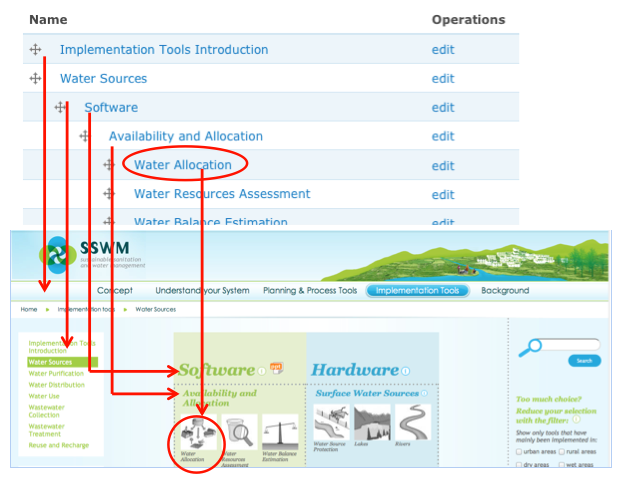
For the menu “[1835-Implementation Tools|” we have a special form of the “Toolbox” pages (pages with icons); the box with the icons is displayed in two columns:
For the menu item “water sources” displayed above, the “code” to “tell” the Toolbox to display this menu item like this is “toolbox”.
The structure is a little bit more complex here. There is one additional level.
The menu tree structure is has a levels of hierarchy more for the “Software” and “Hardware” Titles in each column. The items one level more to the right (“Availability and Allocation”, “Creating an Enabling Environment”) are the titles of the sections inside of the box, all items even more to the right e.g. “Water Allocation” are the icons which are leading to the factsheets.
7) Creating a Hierarchy / Structure in the Menu for "Toolboxes" (single pages, combined pages and two-column pages)
When you “create” or “edit” a term, you will have the following view (which you already know):

In “advanced options” and you will see the following view on your screen:
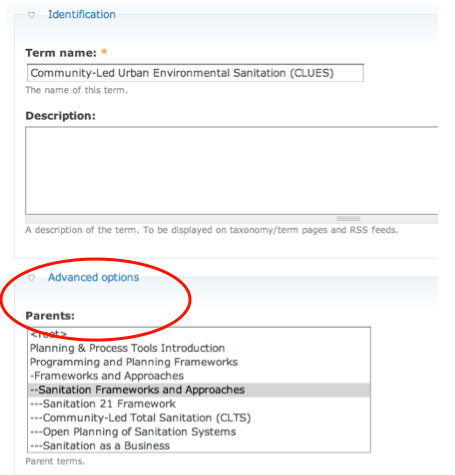
Look at the box “Parents”. There you may choose the menu item, which is the upper level. In this case “Sanitation Frameworks and Approaches” is the section title under which you would like to show up the icon of “Community-Led Total Sanitation (CLTS)” content.
